

Home
Operating system
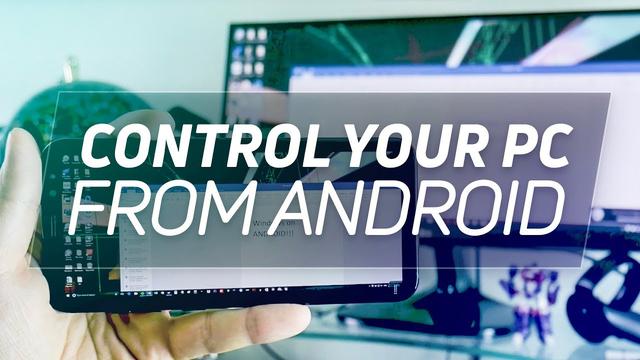
How to control your PC with your Android phone
How to control your PC with your Android phone
Admit it: you once owned a crazy multifunctional remote control. It has a black and white touch screen, which should allow you to control every entertainment device in your home from the comfortable sofa. That is a promise, at least. All it really does is force everything to the wrong aspect ratio and switch the clock on the microwave oven to Greenwich Mean Time.
Well, good news: The world is now a better place. Your PC is now the most powerful entertainment device in your home, so it’s time to ditch your outdated remote control in favor of your smartphone.
When you have open platforms on both sides of the equation—your Android phone and your PC, rather than “some Panasonic remote” and “some DVD/HDTV combo thing”—it becomes easy as pie to rig up a super-powerful remote-control solution. A smartphone super-remote isn’t just for people who have home theater PCs, either. With a little networking know-how, you can use your Android phone to wake up a dormant PC when you’re away from home so you can start a torrent, stream media to your phone, or just poke around your PC while you’re out and about.
Whether you want a media remote, a remote desktop client, or a way to stream media from your PC to your phone, this guide will teach you how to get set up with a secure, usable connection on the desktop side and connect with the best apps on the Android side.
Make sure your PC is ready for business
A quick word: These instructions assume that your phone and computer are connecting to the same router,
and
that you’ve assigned a static IP for your computer on the network so that it gets assigned the same local IP address (192.168.
x.x
) every time it’s turned on. (Remember that bit of necessary networking know-how I was talking about?)
Every
router is different, so it’s impossible to provide specific advice for this step. However, the basic process goes something like this:
1.
Look up the hard-wired MAC address for the connection you’re using (wired or wireless) on the machine you’re using. On Windows, you can get this info by opening a command prompt and typing
ipconfig -all
. On a Linux or Mac OS machine, open Terminal and type
ifconfig -a
. Scroll down to find your router’s IP configuration info—the MAC address will usually be listed as a Physical Address entry that looks like this: a2:b9:34:54:cc:10.
To find a computer’s MAC address, look for the Physical Address entry after running ‘ipconfig - all’ from the command prompt.
2.
Go to your router’s configuration page by opening a browser and typing 192.168.1.1 or 192.168.0.1 into the address bar. If that doesn’t work, consult this
list of common router addresses
or check the manufacturer’s website. Poke your way around the router configuration page until you find the static IP settings, then input the machine’s MAC address, its name, and the IP address you want it to have henceforth (192.168.1.100 is usually a safe choice). With that out of the way, we’re ready to go.
This article is written primarily with Windows in mind, though all of the remote solutions we’ll be using—except Unified Remote—will also work on a modern version of Linux or Mac OS X.
Unified Remote lets you control your PC with your phone
Simple and slick, Unified Remote is a no-brainer to set up. Just pop over to the
Unified Remote website
, grab their server application for your PC, and run through the install process. You’ll want to set a good strong password, but otherwise everything’s pretty much good to go by default. If you’re asked to open Windows Firewall for this or any other program presented here, go ahead and say yes. Next, grab the Android app either from the Play Store or by following the download link from the Unified Remote website—which also links to the Windows Phone app, if that’s more your style.
Unified Remote lets you use your phone as a mouse, and it works great.
Launch the mobile app and—if you have the Unified Remote server running on your computer and your network is feeling happy—it’ll try to automatically configure itself; if that doesn’t work out, you’ll have to manually add your server by entering your PC’s IP address.
Once you’re connected, dive into the Remotes section of the app. There are lots of options you can play with in here—the two that I’ve found the most useful are ‘basic input’, which lets you use your phone’s touchscreen as a surprisingly intuitive mouse for the PC, and ‘media’, which provides play/stop/volume keys that are similar to the ones you might have on your physical keyboard.
It’s good stuff, and there’s basically no lag if your network connection is stable. The limitation of Unified Remote is, obviously, that it’s useful only as a literal remote—you must be looking directly at the machine you’re controlling to see the effects of your faux-cursor or media keys.
VLC Remote ’n Stream is the best of both worlds
This app is actually called VLC Direct Pro Free, but I like the
’n
because it makes this sound like a discount car wash. If you need one app that can act as both a media remote and a channel for streaming media from your PC to your phone, VLC has the answer—
if
you already use VLC to handle all of your video-playing needs. And if you don’t, you ought to—VLC is open-source, cross-platform, and one of the best media players around; grab it for free from the
VLC website
.
Now just launch VLC, open
Preferences
from the
Tools
drop-down menu, toggle
Simple
to
All
in the bottom right, and in the left-hand menu, expand
Interface
and click
Main interfaces
. There should be a
Web
option—check it. Close the Preferences menu, but leave VLC running for the time being.
There are tons of settings to tweak in VLC, but you just need to enable the ‘Web’ interface to start streaming your media to your phone.
Next, grab the
VLC Direct Pro Free Android app
from the Google Play store. By default, it will try to scan for a open VLC server on the network. Hopefully, it will automatically hook in to your PC—you did leave VLC running, of course—but if it can’t detect your PC, the app will ask you to input an IP address, just as with Unified Remote.
Once you’ve connected, you’ll be greeted with the program’s main interface, which is a little cluttered. The TARGET icon in the top right refers to whether you’re controlling media on your PC (indicated by the traffic cone, the VLC icon) or streaming it to your phone (indicated by the Android icon). The play/pause/stop controls, as well as the volume bar, are at the top right, and the list of files available to you are represented by the four icons arranged horizontally: From left to right, they represent local video on your phone, local audio on your phone, media on your PC, and recent files from your PC. Once you’re playing something on the PC, you’ll get a progress bar at the bottom
of the interface that you can use to scrub back and forth through the media. And that’s it!Well, there are actually three more things you should know about VLC. First, your phone may not be able to play all of the video files that your computer can by default—you’ll want the beta
VLC for Android app
for that (it integrates pretty well with the app once you associate it with video files by default).
Thing two is that you can actually access this same VLC remote-control interface from another computer on your network via a browser—say, if you’re connected to your media PC from a laptop on the couch. Just go to 192.168.1.100:8080 (if you set a different static IP address, replace it with that one).
Thing three is that you’ll need to have VLC already running on your computer in order to connect to it, and it’s not really your typical background app—you can set it to run at startup, but you’ll occasionally find yourself in the weird situation of having to close and reopen it when you want to switch from watching a given media file directly on your PC to streaming from it. Unfortunately, there isn’t really a good solution here beyond using, say, Unified Remote first to open it up, then jumping in with the VLC remote. The things we’ll do in order to avoid getting up from the couch, huh?
VNC—a.k.a. the cream of the crop
VNC—Virtual Network Computing if you’re feeling fancy—is the best remote media sharing system you’ve probably never heard of. At the most basic level, VNC is an alternative to Unified Remote for when you just want to be able to move a cursor around on the screen—but with a little creativity you can come up with all sorts of other uses. For example, I’ve managed to access my office PC to scan, convert files to PDF, and mail documents while watching a movie on a different computer in another room.
Installing a VNC server on your computer is fairly uncomplicated—
Windows users just need to grab the free version of the RealVNC client from the
RealVNC website
, install it, and set it up on your PC with a good strong password.
The RealVNC server client is free, simple to set up, and relatively lightweight—start it up, and it should just run in the background on your PC.
Ubuntu Linux users must install
x11vnc
from the Ubuntu Software Center, then open the Startup Applications menu and add this entry:
x11vnc -forever -passwd xyzzy -rfbport 5900 -bg
, where ‘xyzzy’ is your chosen password.
You’re good to go on the PC side! Now you just need to get a VNC app for your phone. There are lots of Android VNC apps of varying quality, but my favorite one by far is
Free bVNC
. The configuration page isn’t anything special, but that’s okay because all you need to do is input your PC’s name, IP address, and chosen password, then hit
Connect
.
You may then want to hit the
menu
key and change the input mode to
simulated touchpad
(I find it more intuitive), but otherwise, that’s that!
Set up a VNC server and use a free VNC client on your Android tablet so you can access your PC from anywhere.
Now you can use your phone to manipulate your PC from anywhere, though you’ll probably want to do restrict yourself to accessing your PC while your phone is connected to your home network, since streaming a high-res PC desktop requires a significant chunk of bandwidth. Accessing your PC remotely via a 3G or 4G cellular connection can be spotty, but VNC’s performance is excellent if you’re on a solid network—I have a combined desktop resolution of 3360 by 1050, and a wireless network that runs about 150 megabits per second, and I get around 10-20 frames per second while remotely using my PC on my phone while I’m in the garage. It’s not quite seamless, but it’s more than fast enough for most tasks.
Wake-on-LAN powers up your PC from anywhere
If you’re interested in managing torrents or streaming media from your PC, but you’ve got it configured to sleep when idle and you’re either out of the house or too lazy to go into the other room to wake it up, I’m about to blow your mind. Most machines have—and have had for years—a feature called Wake-on-LAN that allows their network card to stay awake while the rest of the machine sleeps, and to switch the PC on when it receives a network message.
Sadly, this is another one of those situations where I can’t give specific instructions, because everyone’s PC is different: if you’re using a network card that’s right on the motherboard, you’ll want to check your BIOS for Wake-on-Lan settings, or else check the Advanced Settings of your network card in Device Manager.
Configuring your network adapter to wake your PC when a "magic packet" is received allows you to wake up your PC at any time by sending it a special signal from another PC or—in this guide—your phone.
On just about any network adapter—except wireless USB adapters—you should be able to find something labeled ‘Wake-on-LAN’ support. Turn that on.
Next, grab the Android app of same name (as with VNC, there are several options, but I’ve gone over them with a fine comb, and the
Wake On Lan Android app
is the best I’ve seen). This time there’s nothing to run on your PC, but as a trade-off, you’ll have to manually input both your machine’s MAC address (remember when you grabbed it earlier) and the IP address to configure Wake On LAN. Once you think you’ve got it set up, sleep the machine, and give it a shot—oughta come right back to life. Just think of what you can do now by combining these apps: You can wake up your machine, open VLC, and stream a movie to your phone, all without getting out of bed!
Carry your PC in your pocket, wherever you go
Now, a final note about using any of these tricks while you’re away from the house. The 192.168.1.100 address we assigned to your machine is valid only within your own network (which is why everyone in the world is allowed to have that same 192.168.1.100 address). To connect from elsewhere, you’ll need to input your global IP address, which you can look up by simply opening a browser window at home and searching for “What is my IP address?” on Google.
Please note: every time your modem reconnects, some ISPs will assign a new global IP, which means you may need to recheck after a power failure (call your ISP first; they It may feel generous enough to assign you a semi-permanent IP). However, before that, you need to set up the router to forward requests from outside the home network to the 192.168.1.100 machine, because connecting to your global IP means that you no longer specify the computer you want to access remotely. You are connecting to a router, so your router needs to know which PC you are trying to access.
Popular Articles/span>


