

Home
Операционна система
How to Change Boot Drive Windows 10? Here Is a Detailed Tutorial
How to Change Boot Drive Windows 10? Here Is a Detailed Tutorial
Summary:
Are you planning to change boot drive Windows 10? Don’t worry if you are confused about what to do. In this post,
MiniTool Partition Wizard
provides a detailed tutorial and you can refer to it to change boot drive according to your needs.
Quick Navigation :
What Is a Boot Drive
How to Change Boot Drive Windows 10
Bottom Line
Change Boot Drive Windows 10 FAQ
User Comments
What Is a Boot Drive
A boot drive is a hardware device that contains the operating system for booting a computer. It could be a hard drive, floppy disk drive, CD-ROM drive, DVD drive, and USB flash drive.
A hard drive is the most commonly used boot drive. When you buy a new computer, an operating system is pre-installed on the hard drive and you can boot it directly.
As long as a computer has been used, users usually need to change boot drive. In other words, they want to replace the system disk with another one, and they often do it due to one of the following reasons:
They want to move boot drive to a new SSD for better performance.
Their old boot drive is
running out of space
and they need a larger one.
There are signs of hard drive failure and they plan to replace their boot drive before it damages.
It might be a little difficult for most common users to change boot drives by themselves, especially for the first time. If you are one of them, don’t worry. There is a detailed tutorial on how to change boot drive in the following contents.
How to Change Boot Drive Windows 10
Generally speaking, there are three stages in the process of changing boot drive:
Back up data.
Migrate OS from the old to the new boot drive or clean install Windows 10.
Replace the old hard drive.
Now, let’s see more detailed information about them one by one.
Stage 1: Back up Data Before You Change Boot Drive Windows 10
It is elementary to back up data before you change the boot drive. In this way, you can avoid unexpected system failure or data loss. And it is better than rescuing data after a crash.
You can
back up your computer
with a USB flash drive or external hard drive. And for the backup software, you can use
MiniToolShadowMaker
, a reliable backup program designed by MiniTool. This tool helps users to make an image as the backup method, which means the backup won’t take much storage space. Now, let’s see how to use this tool to back up your original hard drive.
Step 1
: Connect a USB flash drive or an external hard drive to your computer.
Step 2
: Download, install, and launch MiniToolShadowMaker.
Step 3
: Choose the local computer to manage and enter the main interface.
Step 4
: Go to the
Backup
tab and click the
Source
selection. Then select your system disk and check all the partitions to back up the whole disk. Click
OK
to continue.
Step 5
: Click the
Destination
section and select your USB drive or external hard drive to store the backup. Then click
OK
.
Step 6
: Click
Back up Now
to start the backup process.
Then you just need to wait patiently until the process is finished. After that, you can disconnect your USB flash drive or external hard drive, and then move on to the next stage.
Stage 2:Migrate OS or Clean Install Windows 10
After backing up data, you can change the boot drive without any worries. As mentioned, a boot drive needs to contain files required for a computer to start. If you want to boot from another hard drive, you need to install an operating system on the drive at first.
You have two options now: the first is to migrate OS from your old boot drive to the new hard drive with a third-party program; the second is to clean install Windows 10 on the new hard drive.
Option 1: Migrate OS to SSD/HD via MiniTool Partition Wizard
MiniTool Partition Wizard is a professional and reliable disk partition management tool. It can help you a lot in your daily life. For example, you can use it to resize partition, recover lost partition or data, check for hard drive errors, and clone disk.
If you migrate OS with this tool when you decide to change boot drive, you don’t need to spend time reinstalling Windows 10, and you can also choose to copy your non-system data or not during the process.
Tip:
This might not be the best option when the operating system on your old hard drive is corrupted, as you could also encounter problems even after changing the boot drive.
Now, let’s see how to use MiniTool Partition Wizard.
Step 1
: Connect your new hard drive to your computer.
Tip:
If your computer has a compatible slot for your new hard drive, you can install it directly as
a second hard drive
. Otherwise, you would need a USB adapter to connect the new hard drive to your computer.
Step 2
: Click the following button to download MiniTool Partition Wizard. Then install and launch the program.
Step 3
: Register to the Pro Ultimate edition with your license key and click the
Migrate OS to SSD/HD Wizard
feature from the left action panel.
Step 4
: In the pop-up window, select option
A
if you pla
n to copy the entire disk. ChooseB
if you just need to migrate the operating system. Then click
Next
And I can do a live Linux boot from a USB thumb drive but I never figured out how to actually partition and install… https://t.co/NvI4C6duq0
— Jake Hamby Wed Sep 30 21:02:56 +0000 2020
to continue.
Step 5
: Select your new hard drive as the destination disk to save migrated data.
Warning: If you select a hard drive that contains data as the destination disk, all the data on it will be removed in the process.
Step 6
: Review the changes you have made and click
Next
. On this page, you can select the copy options and target disk layout according to your preferences. There are two tips for you:
If your destination disk is an SSD, you’d better check the
Align partition to 1MB
to improve the performance.
If your destination disk is larger than 2TB, you should check
Use GUID Partition Table for the target disk
to take advantage of the storage space.
Step 7
: Read the note that tells you how to boot from the new hard drive and click
Finish
. Then click
Apply
to start the data migration process.
The process would take some time, and you should wait patiently. Don’t shut down your computer during the process. When the data migration is finished, you can shut down your computer and change the boot order to boot from your new hard drive. If it works properly, you can go to the next stage.
Option 2: Clean Install Windows 10
If you expect a fresh system without any hidden corruption or you don’t need to move your data to the new boot drive, you can clean install Windows 10. To do this, you need to download the latest Windows 10 installation ISO file from the Microsoft website and burning it to a USB drive or CD/DVD, and then use the USB drive or CD/DVD to install Windows 10.
Here are the detailed steps about how to clean install Windows 10.
Step 1
: Connect an empty USB flash drive to your computer. Then search for Windows 10 download in your web browser and visit the official website of Microsoft to download
Windows 10 Media Creation Tool
.
Step 2
: Open the downloaded file and accept the applicable notices and license terms.
Step 3
: On the window of “What do you want to do”, select
Create installation media (USB flash drive, DVD, or ISO file) for another PC
and click
Next
.
Step 4
: Select language, architecture, and edition. Then click
Next
to continue. In the following window, select
USB flash drive
and click
Next
.
Step 5
: Choose your USB flash drive and click
Next
. Wait until the process is finished.
Step 6
: Shut down your computer and connect your new hard drive to your computer. Then turn on your computer and
change the boot order
to boot from your USB flash drive.
Then you just need to follow the onscreen instructions to install Windows 10 on your new hard drive.
After installing Windows 10, you can disconnect the USB flash drive and try booting from the new hard drive. If your computer boots successfully, move on to the next stage.
Stage 3: Replace Your Old Boot Drive with the New One
Once you migrate OS or reinstall Windows 10 successfully, you can remove your old boot drive and install the new one. However, if your computer has enough hard drive slots which support you to keep both hard drives, you can also keep the old one installed. In this case, you can
format it
and use it to store data as a second hard drive.
Tip:
If you don’t know how to remove the old hard drive, this post might be helpful for you: 7 Steps:
How to Remove Hard Drive from Laptop
.
Bottom Line
Don’t vex if you are confused about how to change boot drive Windows 10. You can get a detailed guide in this post. If you have any questions, you can post them in the comment section below. For any problems you encountered while using MiniTool Partition Wizard, you can contact
[email protected]
for solutions.
Change Boot Drive Windows 10 FAQ
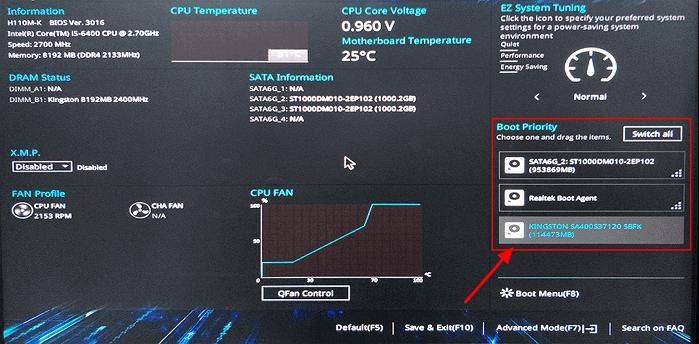
How do I choose which drive to boot Windows 10?
Restart your computer and access BIOS.
Go to the
Boot
Use the
+
and
–
keys to change the boot order.
Select
Save & Exit
According to the manufacturer of a computer, the detailed steps might be different.
What is the boot menu key for Windows 10?
The boot menu key on computers from different manufactures could be different. Common keys are Esc, F2, Del, or F12. Usually, you can see how to enter BISO when the logo of the manufacture appears during the start process. You can also check the user manual or search on the internet to get the information.
Can't boot from USB Windows 10?
If you can’t boot from a USB flash drive, you can find some solutions in this post:
What If Your PC Can’t Boot from USB
?
Popular Articles/span>


