

Home
Operating system
Install Howto
Install Howto
Install FreeDOS 1.2
Need some help installing FreeDOS 1.2 on your computer? Here is a step-by-step guide to installing FreeDOS. Installing FreeDOS uses the same process whether you install FreeDOS in a PC emulator or on actual hardware.
Note that if you install in a PC emulator, you will probably need to set your system to boot from CDROM before the hard drive, so the FreeDOS install CDROM will boot first.
How-to video
Jim recorded a short video to walk you through installing FreeDOS 1.2. The demo uses the “GNOME Boxes” PC emulator, but the steps are the same for any PC emulator.
Step-by-step
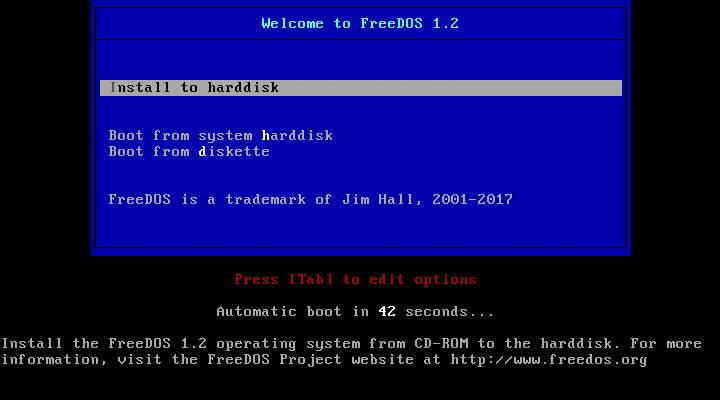
Booting the CDROM installer gives you a menu. You can choose to install FreeDOS, or boot from the system harddisk or from a diskette.
The installer supports different languages. The default is English.
Welcome to the FreeDOS 1.2 install program. We provide a standard warning here. For new users, we recommend installing FreeDOS in a PC emulator or “virtual machine.” If you install FreeDOS on a computer directly, without using a PC emulator, you may overwrite the operating system you have now (for example, Windows.) Please be careful.
If your
C:
drive isn't partitioned for DOS, the installer detects that.
To partition your hard drive, the installer jumps to the FDISK program.
Select
1
to create the DOS partition. This will be your
C:
drive.
At the next screen, select
1
to create the primary DOS partition.
When asked, select
Y
to use all available free space for your primary DOS partition. On an empty hard drive, this uses all of it.
FDISK creates your
C:
drive partition and marks it as “Active.” Press
ESC
to continue.
@xSkilledBeauty thats my dad despite the fact that he taught me how to install dos when i was a child
— taltigolt Tue Jan 28 00:41:09 +0000 2020
After you partition your hard drive, you need to reboot for FreeDOS to see the changes. Press
ESC
to exit FDISK.
The FDISK program will warn you that you need to reboot your computer for the changes to take effect.
The FreeDOS installer lets you reboot your computer.
Restarting the install…
After rebooting, the installer starts up again automatically. Select your preferred language.
And continue with the installation.
If your
C:
drive isn't formatted for DOS, the installer detects that. If you just created your DOS partition, the installer can format it for you.
Output from the FORMAT program. If you don't press a key in fifteen seconds, the installer continues anyway.
The installer first needs to gather some information. At this step, the installer is reading configuration data.
Your preferred language might not match your keyboard language, so we let you select your keyboard layout here.
The FreeDOS 1.2 installer has two default install modes: install only those packages that reproduce the functionality of classic DOS (“Base”) or install everything (“Full”). Because FreeDOS is open source software, we give you the option to install source code, too.
This is your last opportunity to exit before we install anything.
The installer prepares for the installation. At this step, the installer is reading a list of packages to install.
Starting the install.
Installing…
The installer lets you know it has finished installing FreeDOS. Depending on what you chose to install and the speed of your system, the install usually takes a few minutes.
The installer automatically makes the
C:
drive bootable with FreeDOS.
The installer also creates default configuration files for you.
That's it! Reboot your system to begin using FreeDOS.
Rebooting the computer…
Booting into FreeDOS 1.2 for the first time. Every time you boot FreeDOS, we give you a menu where you can select the memory configuration. The default is JEMM386, but you can use EMM386 instead, or no drivers, or only a few drivers.
The FreeDOS 1.2 command prompt after booting. You are now using FreeDOS!
Popular Articles/span>


